Xiangzhi‘s Portfolio

Plotter pen mechanism
Design a linkage mechanism that positions a plotter’s pen for tracing on a flat, horizontal surface and afterward stores it inside a fixed cap that prevents it from drying. The two extreme positions of the pen are shown in the figure:


To make sure the rotation piece fits in the 4 bar linkage, I choose the SG90 Micro Digital Servo Motor. I craft a hole on one end of the plastic board.
The thickness of the motor arm is just equal to the plastic board and can let the rotation piece free to rotate.


Another hole is drilled on the side of the rotation hole so that the motor arm can be inserted in.
For joint points in the other three positions, a single-plated fastener may not able to let the joint rotate freely. I came up a way to combine two pins together. By bending the tail of two pins, you can create two hooks and hook them together.

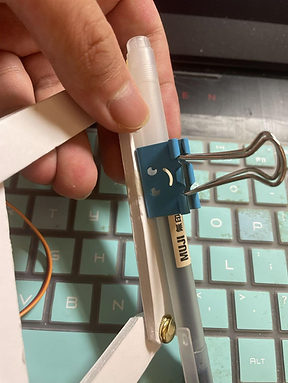
I used a clip to stabilize the pen to fit different kinds of pens. The back of the clip sticks on the linkage bar by double-sided tape.

The upper picture is my circuit design. I used two buttons to control the motor's rotating direction. This design may also satisfy the need to adjust the pressure of the pen’s tip on the paper. With a larger degree of rotation, the pen tip can express more pressure on the surface of a paper.

This is the code of my design. Pinpoint 5 is the general control wire that connects with the yellow line in the motor. Pinpoint 2 and 3 are used to control rotation. They will rotate to a certain pre-set direction if they detect high voltage.
The upper picture is my circuit design. I used two buttons to control the motor's rotating direction. This design may also satisfy the need to adjust the pressure of the pen’s tip on the paper. With a larger degree of rotation, the pen tip can express more pressure on the surface of a paper.